If you are too broke to hire a professional or simply would like to try your hand at it, you are in for a brief, exciting and effective lesson.
The quality of your tires makes all the difference in the world. Failure to provide good tires and use of worn-down or low-grade tires causes poor traction and puts you and your companions in danger.
Many car owners do not dig deep into it and hire mechanics instead of doing it on their own. This can be quite tiresome and costly, because many mechanics charge good sums for simple procedures such as this.
This article gives a clear and consecutive description of the process. It explains every little step in a concise way. With the guide at hand you can save a good sum of money.
Try Your Hand at It And Get the Hang Of It
Some car owners are hardly aware that it is possible to remove tires without using sophisticated tools and machinery. Once you learn how to do that, it will be as easy as a bee.
Have All Things Close at Hand
Before getting down to work, be sure you have all the tools and implements at hand and they are safe and usable. Nothing should be getting in the way as you do the job. Here are things you will need to use:
- Lubricants
- Screwdriver and wrench kits
- A bead breaker
- A core remover
- A car jack
Removing it
It is always a good thing to know how to deal with tire issues, because they may occur on the road when you least expect. You should have all kits and tools with you and know how to deal with the problem. Please, do the steps described below.
Step 1: Find a safe place
If a tire fails on the road, pull over to the side of the road. Be sure you are not going to hinder other vehicles’ movement and you can do the job safely.
If you are doing it in the garage or in front of your home, be sure there is enough space and light.
Step 2: Use the car jack

Jack up your vehicle. Be sure you have the right type of car jack and it is functioning properly. If you have done this before, you won’t have any difficulty:
- Park your vehicle on a flat spot and block the wheels.
- Use a chock that came with your car, or use a block or piece of rock.
- Park the brake and check the motor.
- Always be sure to find the jack point. It is a reinforced part of the frame designed for safe lifting of a vehicle. If you apply your car jack elsewhere, you may end up with serious damage to the frame.
- Be sure to place the car jack properly. Pay attention to a sticker on the jack to ensure correct orientation.
- Adjust the jack and lift your vehicle.
Step 3: Remove the wheel(s)
Loosen the wheel screws and take off the wheel. Be sure to put the screws in a secure place, so you can find them any time.
Be sure to find a comfortable place, so you can work easily. There should be enough space and light, and it should be placed on a flat surface.
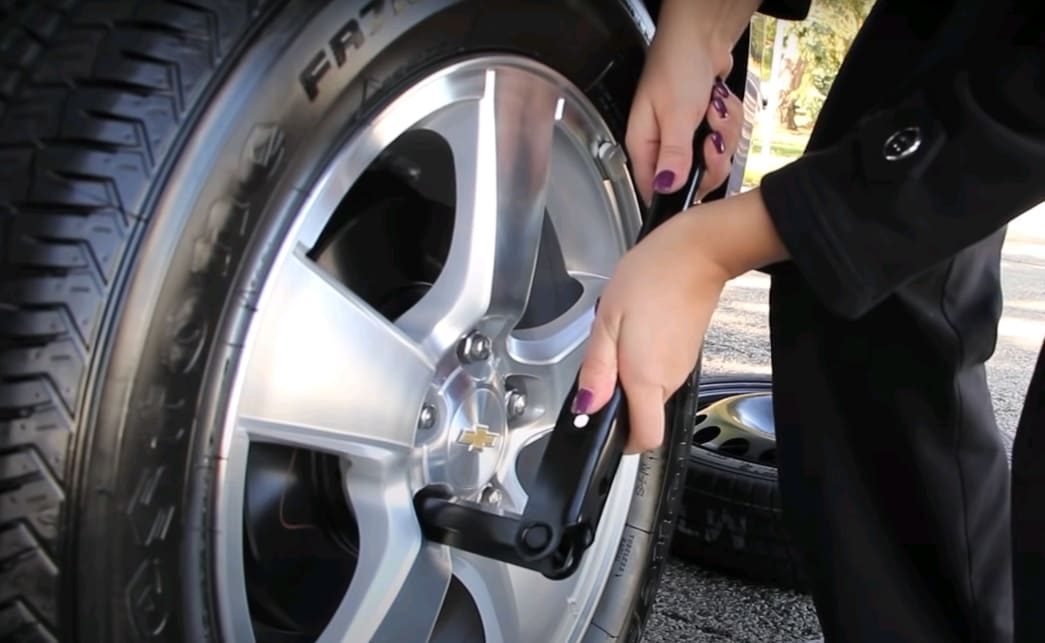
Step 4: Release the air from the tire

You won’t be able to remove the tire without deflating it. To do so, find the valve and do the following:
There are metal and rubber valves. Usually, a tire valve has a tube-like shape and features a core inside. The core features a cap that prevents dirt, dust and debris from getting inside. To deflate the tire, press down on the cap or use a valve core removal tool.
Step 5: Separate the tire from the rim
The tire is in a tight contact with the rim, and that is one of the most challenging parts of it. It takes a bit of effort to break the glue. Be sure you have all tools close at hand.
If you have a dedicated bead-breaking device, you will do it easily. If not, you are going to have to do a bit of manual work. Let’s start with the most challenging option.
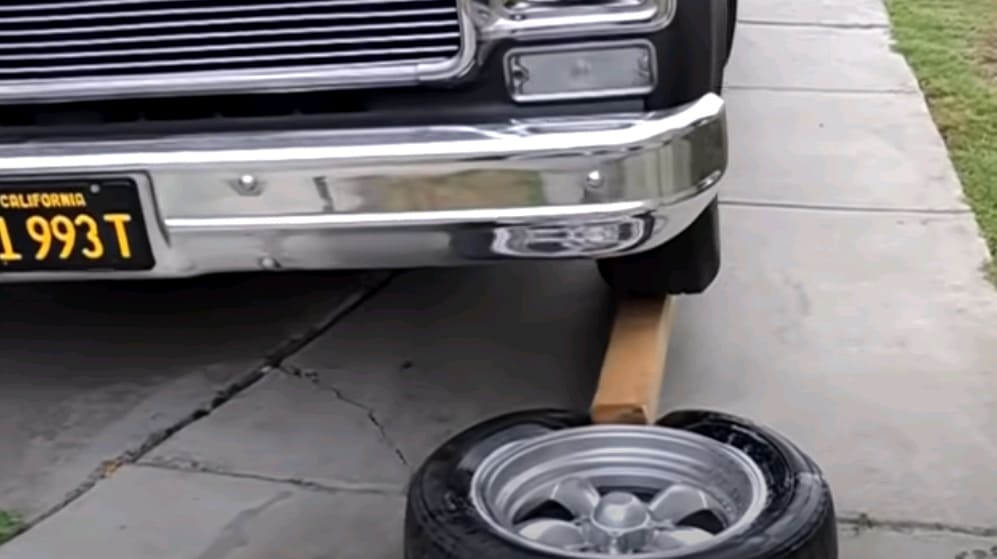
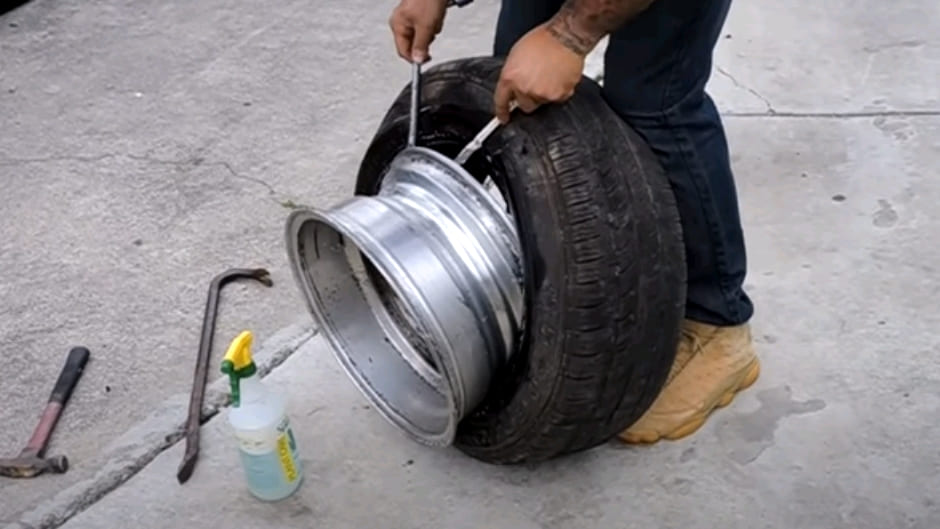
To break the adhesive manually, get a knife, pry bar or another handy and sharp tool. Insert it between the tire and the rim. Be careful not to damage it. Do this all the way around the rim. In case you have a hard time separating the tire from the rim, driving several times over the rubber may work. The downside of this method is that, most likely, it will send the tire to the trash can.
A bead-breaking device will make things easier for you. The whole thing will take moments. Or, put the vehicle back on the ground and drive it for a little while. Check the tire and be sure it has come apart from the rim.
Step 6: Use the lubricant
Now that you have separated the tire from the rim, lubricate the new tire and the rim. Be sure that all contact points are lubricated thoroughly.
If you are not sure why you should be doing this, here is an explanation: you won’t have much difficulty next time you need to take off the tire.
Step 7: Actually remove the tire
This is all but the last thing you need to do. However, it will take a bit of physical effort. If you are doing this for the first time, you may have a little hard time.
Spread a piece of cloth and put the rim onto it. This will help you immobilize the wheel and prevent damage to the rim.
Or, you can support it with your legs and use your body weight. Use the tools and apply force around the rim to separate the tire.
Step 8: Apply the lubricant to the rim once again
You have already done that. Another layer of the lubricant will shield the rim against debris and water and help prevent corrosion. Second, you will find it much easier to fix the new tire. The experience will definitely make it easier for you next time and help you save an extra sum of money.
Separating It Using a Tire Removal Device
Removing the tire with a tire changer will be much easier. Tire removers are user-friendly and are designed to make the process easy for newbies as well.
Things you will need to use
This will require some tools too. Please, be sure they are close at hand, so you won’t need to rush about the place looking for one when you suddenly realize it is not there. These are:
- Manual tire changer
- A ¾ inch thick plywood board
- A lubricant
- A core remover
- Wrenches, screwdrivers and bolts
- A marker
Removing the tire
A tire changer speeds up and eases the process, as it frees you from a lot of physical work. Once again, you are going to have to jack up your vehicle and take the wheels off as described in the previous section. However, the procedure includes a number of specific steps, which are not part of the manual procedure.
Step 1: Prepare the tire changer
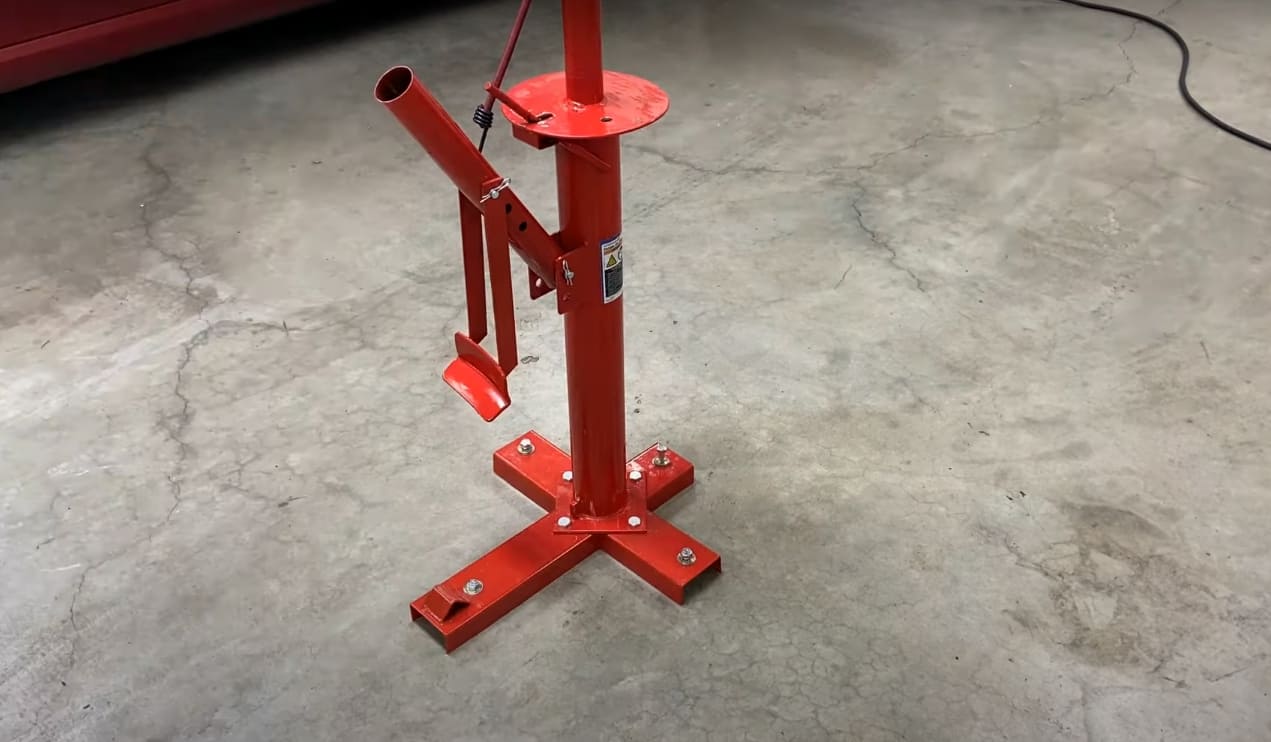
The plyboard will ensure that the tire changer will stand firmly on a flat surface. Place the changer on the board, choose the position and mark it with the pen.
Drill holes in the board where marked and bolt the tire changer to the plyboard. You can as well use a concrete block. Be sure you have tools that can make holes in the material and it is possible to fix the tire changer on such a block.
Step 2: Release the air from the wheel
You should deflate the wheel manually using the valve. Push on the core remover, turn it counterclockwise and unlock the valve. The air will begin to escape from the tire.
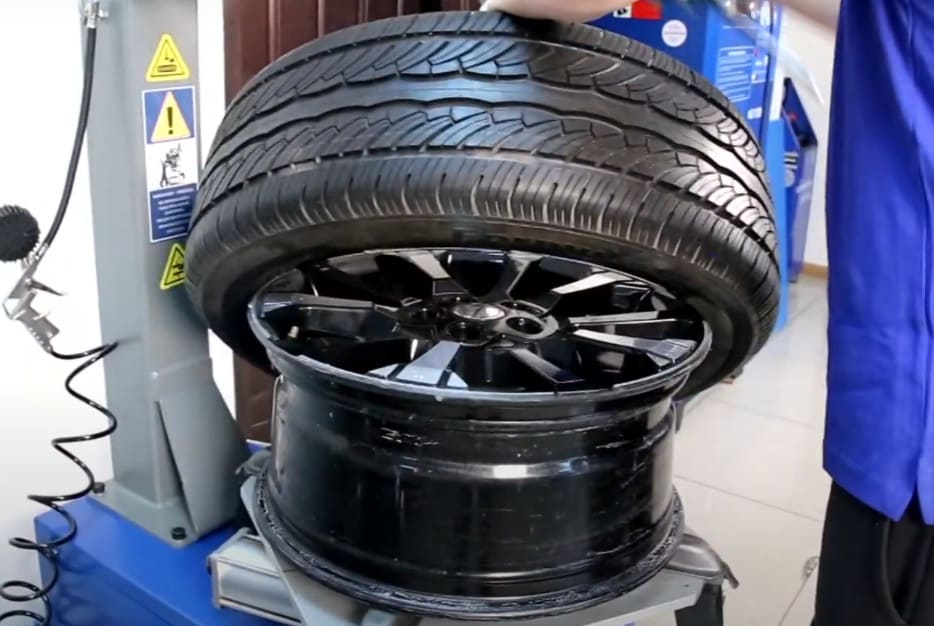
Step 3: Place the wheel on the tire changer
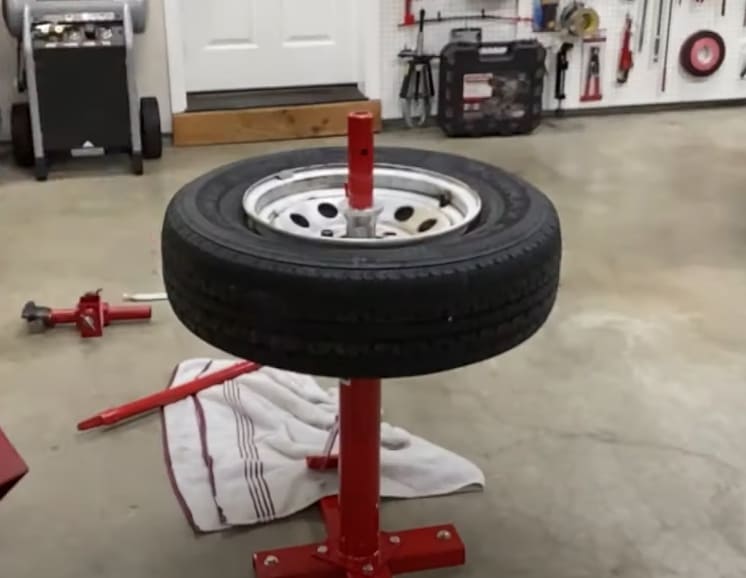
Put the wheel on the triangular nub of the tire changer. Be sure that the front part of the needle is facing upwards.
Fix the machine’s arm on the upper part of the tire. Be sure that you have clamped the tire so it won’t slip during the work.
Step 4: Use the rod properly
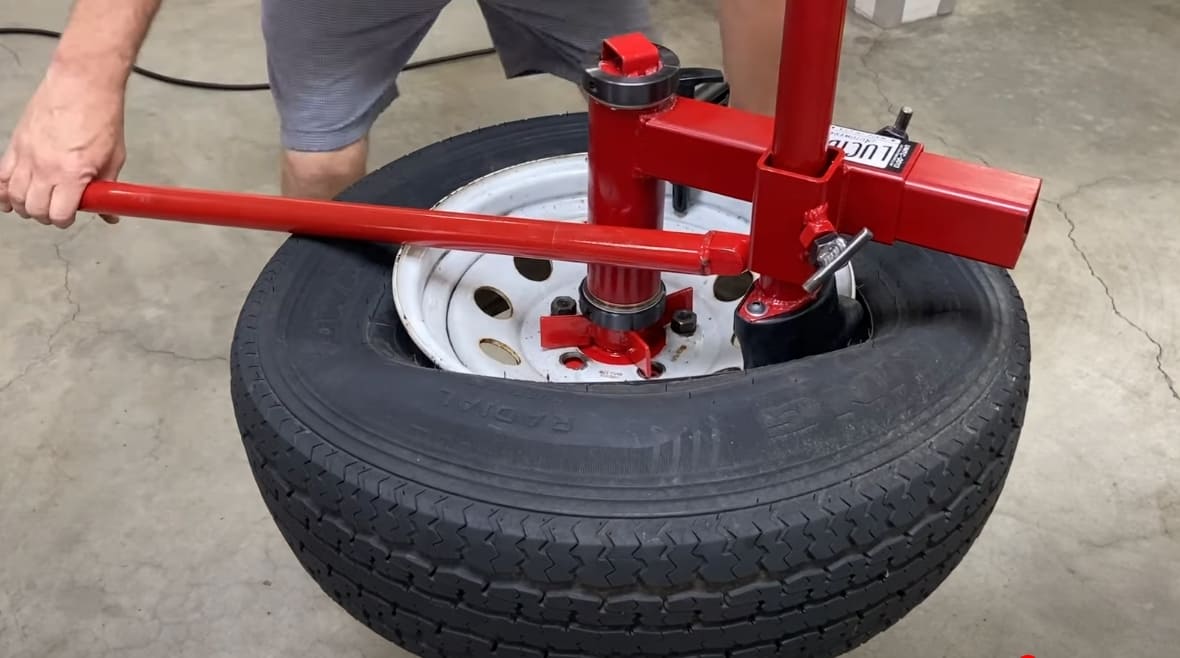
Thrust the rod between the rubber and the metal rim and press down on the other end. Thus you will deliver enough force to separate the tire from the metal rim.

Next thing you do is place the wheel on the other side and repeat the procedure. Apply a sharp object to separate the tire along the rim line. Once the rubber is separated on both sides, you can take it off completely.
Step 5
Last thing you should do is lubricate the rim. The job is done!
Summing it up
Now that you have read the guide, you know how to remove tires from wheels. There are several ways you can do it without having to pay mechanics. Just do the simple steps described in the article and save a good sum of money.
Even if you do not have a dedicated tire changer, getting the tire off the rim is no big problem. If you check this guide, you can choose the easiest way to do the job.
Please, do all the procedures very carefully to avoid damage to the wheel. Be sure to lubricate the rim after taking off the rubber. This will help you extend your tire’s and rim’s life.